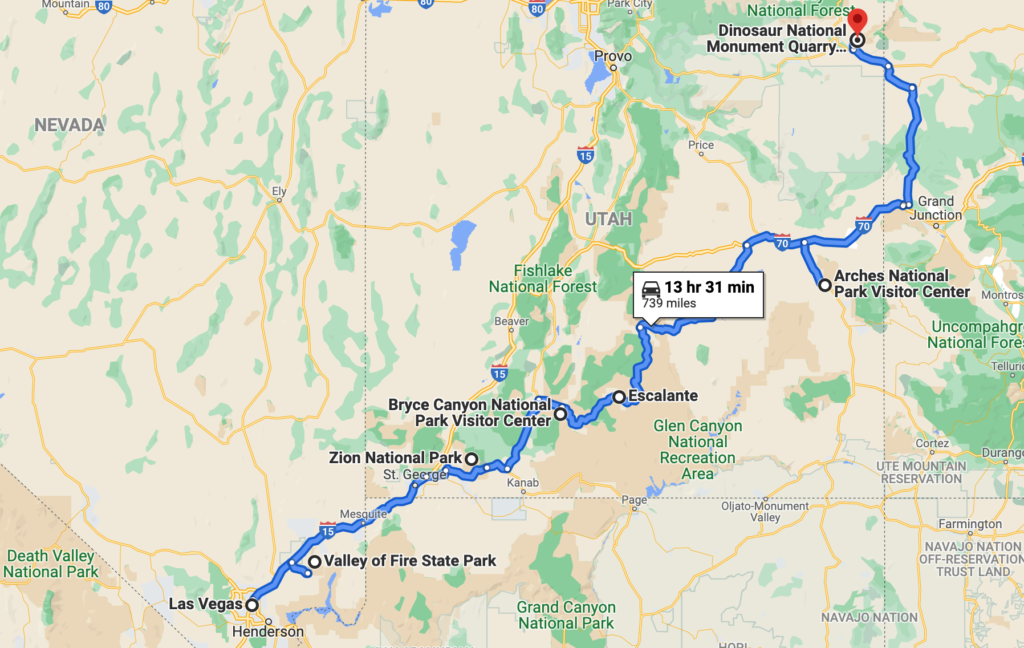
The Whirlwind hits all 5 of the “Mighty 5” Utah National Parks, plus some of our favorite National Monuments and State Parks along the way – including Escalante, where we got engaged – and drives along the 12 Scenic Byway, Chris’ favorite road. It’s about 13.5 hours of driving, averaging about 2 hours per day. Starting in Vegas and ending in Salt Lake City is right about 1,000 miles (but won’t include back and forth to camping, food, etc). Most RV or van rentals also charge a mileage fee on top of nightly costs, so make sure you add that into your estimation.
Jump to:
- Permits
- Las Vegas
- Valley of Fire State Park
- Zion National Park
- Bryce Canyon National Park
- Escalante National Monument
- Capitol Reef National Park
- Arches National Park
- Canyonlands National Park
- Colorado National Monument
This guide is going to go through how we would recommend you do it, with other top rated options in case those aren’t available or don’t fit your capabilities. But! If something else looks better, do that thing instead. It’s your trip!
Be aware
Driving
If this is your first time in an RV or van – awesome! I’m thoroughly jealous of the trip you’re about to take! But it can also be an intimidating experience. Even though it seems like you’re driving a boat, a Class C RV is only about 2 feet wider than a typical SUV. The first trick is to get comfortable with your mirrors – mirrors in larger vehicles are huge so that you can see the lanes and blind spots around you much easier than in a car. Getting used to seeing a car come up around you and pass you and being able to see it in the mirrors the whole time while not being able to see out of the back is kind of a weird and scary and awesome experience at first, but soon it will become second nature, I promise! The second thing is speed – find a speed you’re comfortable with, cruise control it, and stay in the right lanes. DO NOT worry about the other cars “stuck” behind you! There’s lots of opportunities to pass when there are single lanes, and there’s lots of multi-lane highways on this route. They will pass you, they are used to it. I promise, do not even give a second thought to cars that are going or wanting to go faster than you. In a couple miles they will have the opportunity to pass, and they will. There are so many RVs in this area that you will probably need to pass some yourself. The third is wind – Utah can be extremely windy in places, and you will be in a vehicle that is shaped like a brick. Heed the signs about windy conditions and slow down until you’re comfortable with the feeling of getting blown around a little bit. You can do this! Have fun!
Gas
You should also always be aware of your gas situation. There are routinely large stretches or desolate highways in Utah where there could be 100 miles between gas stations. Download the Gas Buddy app to check where nearby stations are and get the cheapest rate. DO NOT try to push it to the next gas station! RVs and vans can eat through gas going uphill faster than you expect, and Utah is hillier than you expect. Worst case scenario, you can get some gas nearby to get you to a cheaper gas station farther away. My general rule is try to refill around half tank, and not to push it beyond a quarter tank. You never know when that next station is going to be out of business, or might be closed extremely early for what you would expect in a city.
Maps
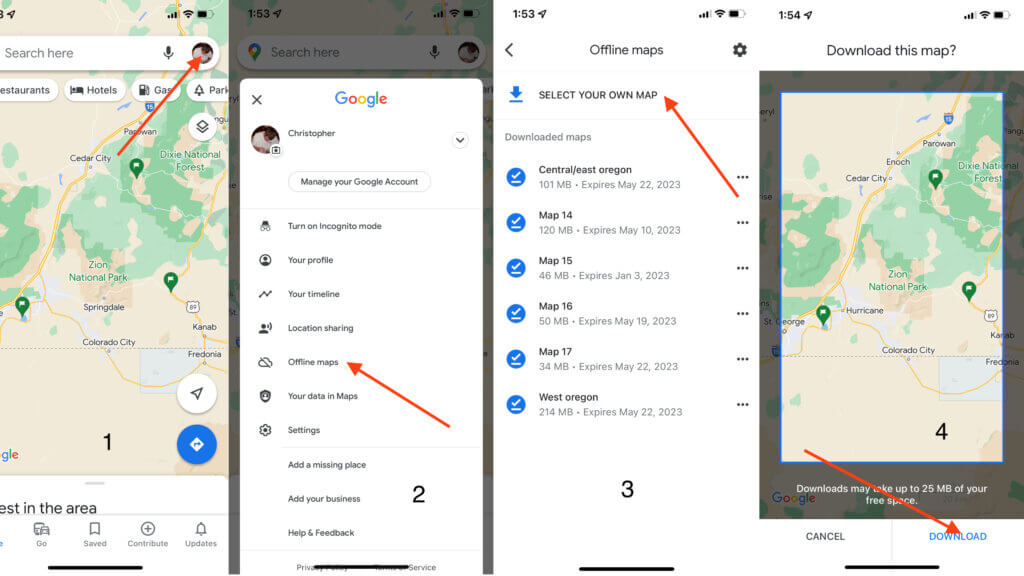
There are large stretches of this route that have NO CELL SERVICE. The best thing you can do is to download the maps BEFORE you take off to avoid getting lost with no cell service. You can do this at any time, so why not right now so it can be downloading while you’re reading the rest of this page? To do this on Google Maps app:
- Tap on your profile
- Tap “Offline Maps”
- Tap “Select your own map”
- Move the map around to select the area you would like to download and tap download
Tip! If you search for an area first, like “Zion National Park”, and then do these steps, it will already be centered on that area.
*Note that Apple Maps does not have this feature, so we recommend downloading Google Maps.
You’ll need to do multiple map downloads to cover the entire area you’ll be driving. You should also do this over wifi, as individually each map is 25-100mb, and downloading them all at the same time will take some time.
and here’s the map of the route.
Elevation
This route starts at about 2,000 feet elevation in Las Vegas, gets to 4,000 feet in Zion, then to 9,000 feet in Bryce (+5,000 feet from Zion to Bryce!), then gently falls to 5-6,000 in Dinosaur, and to about 4,000 feet in Salt Lake City. Altitude sickness can start to kick in after 6-24 hours above 8,000 feet. If you are used to very low altitude, or have asthma or can have trouble breathing, please consider that in your choice or hikes and the amount of time you want to spend active vs resting. Note that most people do not suffer from “altitude sickness” at even 9,000 feet, but you may be fatigued easier or find it harder to catch your breath. They also sell canned air that may help and are sold in most high altitude gas stations so you don’t need to pack it. It may be worth picking up as “insurance”.
Permits
Some of the activities in The Whirlwind require a permit. I’m putting all the permits at the top so it’s easy to find later, when you actually need to apply for it.
| Arches NP | $2 per car per entry | Available now for dates in August and September |
| Fiery Furnace | $10 per person | 8/31 for 9/7, first come, first served. 25-75 available |
| Angel’s Landing | $6, then $3/pp if issued | Day before permits only, unknown per day |
Arches – Timed Entry
New for 2022 is that entering Arches REQUIRES not only a permit, but the time you can enter. To get in to Arches, you will need this permit! Get these early, and make sure you’re prepared for the entire day, as you cannot leave and come back in!
Arches – Fiery Furnace
Fiery Furnace is now available on recreation.gov 8 days before you plan to do it. These go super quick and you need to be prepared to get them. They are $10 per person and only issue 25 – 75 permits per day. If you get a reservation, you need to stop by the Visitor’s Center 9am – 4pm on the day of your permit to actually get your permit! You’ll be required to watch a video and do a little paperwork. If you need to pick up you permit before then, you can pick it up the day before your permit at the Moab Information Center in downtown Moab, 1pm – 4 pm. More info on the Fiery Furnace in the Arches section.
Zion – Angel’s Landing
New for 2022 is a permit system for Angel’s Landing. You can register for the lottery between 7/1 and 7/20 for Fall Permits, and they will announce the winners on 7/25. You can apply for a permit once, and it can include up to 6 people, and you request have up to 6 days/times on the permit. The application is $6, then if you win, $3 per person. So a couple would end up paying $12, a family of 4 would be $18. If you don’t get that, they hold back a chunk for next day permits. You can apply between midnight and 3pm the day before and they draw at 4pm. Same price there. They do not announce how many permits are released each day, or how many in each lottery. More info on Angel’s Landing in the Zion section.
America the Beautiful Parks Pass
If you were to follow this itinerary exactly, the entrance fees would be $240! The National Park system has created a pass called the America The Beautiful Park Pass that is $80, is valid for a year, and accepted at over 2,000 National recreation areas. In fact, the only park on this itinerary (including Dinosaur) not covered by the Parks Pass is Valley of Fire, because it is a state park.
DO NOT buy the pass from the USGS website! I didn’t even link it here on purpose. If you buy it from the website, they mail it to you and it’s good from a year from when you purchase it, so it’s better to buy it directly from the Parks. When you go to Zion, ask for the America the Beautiful pass (they sometimes call it the Interagency Pass) and they will give it to you on the spot, good through September 2023.
Bureau of Land Management (BLM)
If you’re not familiar with camping the lands of the West, the Federal Government owns and manages nearly 50% of the Western side of the country, and most of it is managed by the BLM. There’s a great 7 episode, 3.5 hour podcast about this issue, how and why it happened, and how lots of the generational Southwest population feel about it called Bundyville (Season 1 – season 2 is not directly about the same situation). It’s also particularly relevant as it mostly takes place in Bunkerville on the Nevada-Utah border on I-15, which you will drive straight through on your way from Vegas/Valley of Fire to Zion (the other part takes place in Malheur National Wildlife Refuge, a little over 2 hours east of Bend, OR). A great time to start it is right at the beginning of your trip!
BLM is your land, you paid for it with your taxes, and you are free to disperse camp on the land – with a few small restrictions. First, dispersed camping is just regular camping, but outside of a developed campground. What it really means is no amenities. No bathrooms, no camp host, no water, no trash cans, no real defined sites, first come, first served. But it’s free! And generally right outside of National Parks and National Monuments, since those are always on Federal Land. The restrictions are generally you can’t stay in one spot for more than 14 days, try to use a campsite that’s already been used before, and don’t trash the place. More information about BLM camping here.
BLM is an amazing resource, but it can also be frustrating at times: people park in ways to take up more than 1 area, it can be full when you arrive and you’re already dead tired, the roads may be rougher than you’re comfortable with, or you might just have trouble finding it. Take all of that into consideration before you decide to use BLM. I would argue it’s all part of the adventure, but you know your patience level better than I do. I also have no qualms parking right next to somebody when it’s dark, or parking near the BLM and moving early in the morning if it’s full. Lots of people use BLM to basecamp for a week or more, but I use it more for overnights and then right back to adventure. Remember, BLM is for everybody, and you’re an everybody!
In this guide, I’m going to recommend BLM in several places. If you’re more comfortable getting a campground, then go for it! But BLM is already yours, and a neat way to experience the lands around your stops on the Whirlwind.
Bring
So what do you bring on a trip like this?
- Hiking Boots / Shoes
- Wool socks
- Day pack
- Water bottle
- Binoculars
- Hat
- Sunglasses
- Sunscreen
- Clothes that can get wet (if doing Narrows in Zion)
- Warm layers
- Head lamp (preferable to flash light)
Ladies – think about getting a pee funnel and getting familiar with it before the trip. Some of the toilets in the less populated areas are pit toilets, and some places (like BLM) might not have toilets at all.
Las Vegas – Friday 9/2
Clear, high 97° low 78°
There’s no shortage of things to do in Vegas, so if you think Vegas is tapped out, check out this list to find maybe something you haven’t tried before.
The Strip
Lots to do on the Strip, from walking through hotels like the Venetian, to shows, restaurants, etc.
Fremont Street Experience
The off-strip experience located where the original casinos were. Certainly a more local feel. There’s a light show at the top of every hour from dark until 2am that is worth the watch! The “performers” (buskers) have to stay in small circles on the groun, and stay for 1-2 hours before having to switch out, so there’s always something fresh. Some of these performers can be risqué (to put it mildly) especially at night, so it may not be kid friendly in the evenings. They are highly regulated, so they won’t hassle you, they cannot even come out of the circle to approach you. There’s also a touristy zip line that is very expensive, and short. Fremont Street, especially at night, can be very loud.
Container Park
Until his death last year, Tony Hsieh (of Zappo’s fame) pioneered and funded a new spot in Vegas for up and coming restauranteurs, artists, and musicians to get a foot hold in the city. His vision continues to flourish, and is a neat place with free playgrounds for kids and adults, concerts, drinks, and small restaurants. The inviting praying mantis at the entrance shoots fire occasionally. Weird and a little wacky!
Mermaid and Aquarium at the Silverton Casino (free!)
Mermaid show in the 117,000-gallon reef aquarium Thursday – Saturday 12p – 1:15p, 2p – 3:15p and 5p – 8:15p and Sunday 10:30a -12:45p, 2p – 3:15p and 5p – 6:45p. Fish Feeding daily at 1:30p and 4:30p. Also a 500-gallon jellyfish aquarium. Neat bar/restaurant in front of the aquariums.
Hoover Dam
Not technically in Vegas, but it’s around, if you’re into that sort of thing. And yes, that’s the real website for the Hoover Dam.
Red Rock Canyon NCA
Striking red rock on the west side of Vegas. Ice Box Canyon hike is 20 degrees cooler than Vegas temps!
Staying 🏕
There’s a ton of places to stay in Vegas, but if you’re looking to stay outside of Vegas, Valley of Fire has 2 first come first serve campgrounds, and tons of BLM on the way to both Valley of Fire and Zion.
Driving 🚐
Valley of Fire is just outside of Vegas, but feels a world away. It’s just 45 minutes from the strip, but if you’re just itching to get to Zion or want an extra day in one of the other parks, this is probably the only one you can skip and still sleep at night. Valley of Fire is an incredible hidden gem that will not disappoint, but if it’s between Valley of Fire and maybe getting another day in Zion or Arches, I think just about anyone would understand. We kind of assume you’re going to be picking up your vehicle on Saturday and usually have pickup times in the afternoon, so Valley of Fire is quick to get to and neat to explore on your way to Zion so you’re not wasting good daylight trying to get to Zion.
Valley of Fire – Saturday 9/3
$15, not eligible for Parks Pass • Clear, high 96° low 77°
If Mars and Earth had a baby, it would probably be Valley of Fire.
Fire Wave (1.5 miles, moderate, 👍🏻👍🏻)
FIRE WAVE MAY BE CLOSED THROUGH SEP 30 – Please read here. Call (775) 684-2770 before heading to the trailhead.
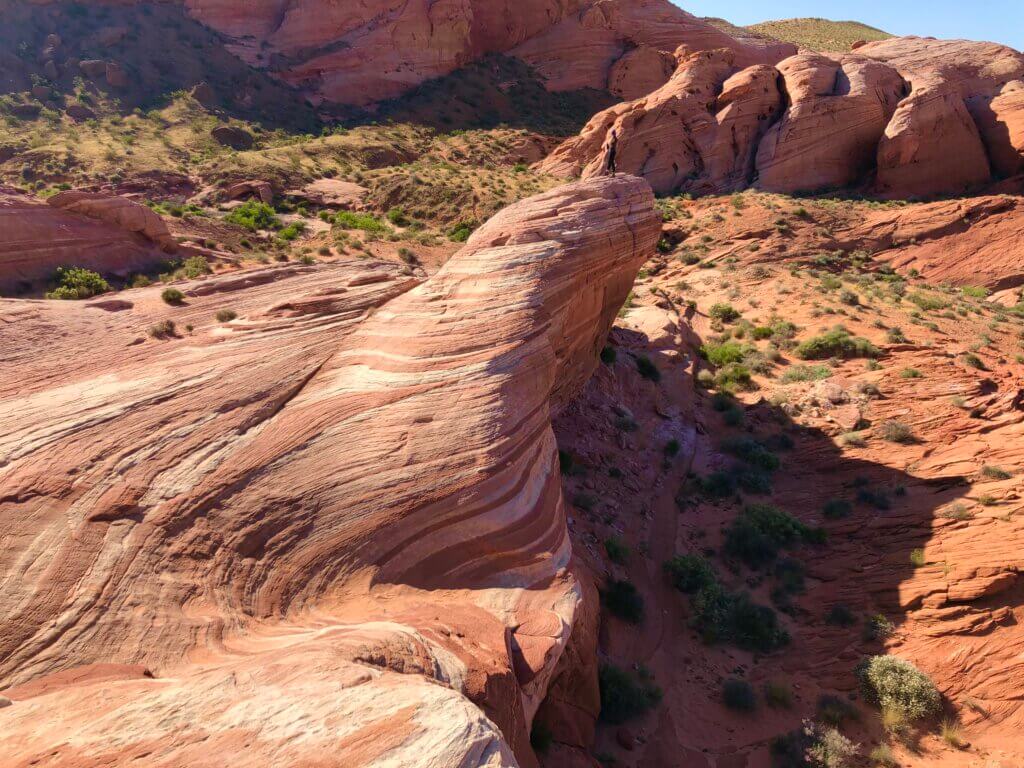
This gets compared to The Wave a lot, and for good reason. It’s a spectacular hike full of undulating red rock, that eventually ends at a fantastic mini bowl, striped and smooth.
White Domes (1 mile, easy, 👍🏻👍🏻)
Trade in that red rock for white, and check out the unique formations and tight canyons.
Petroglyphs / Mouse’s Tank (1 mile, easy, 👍🏻)
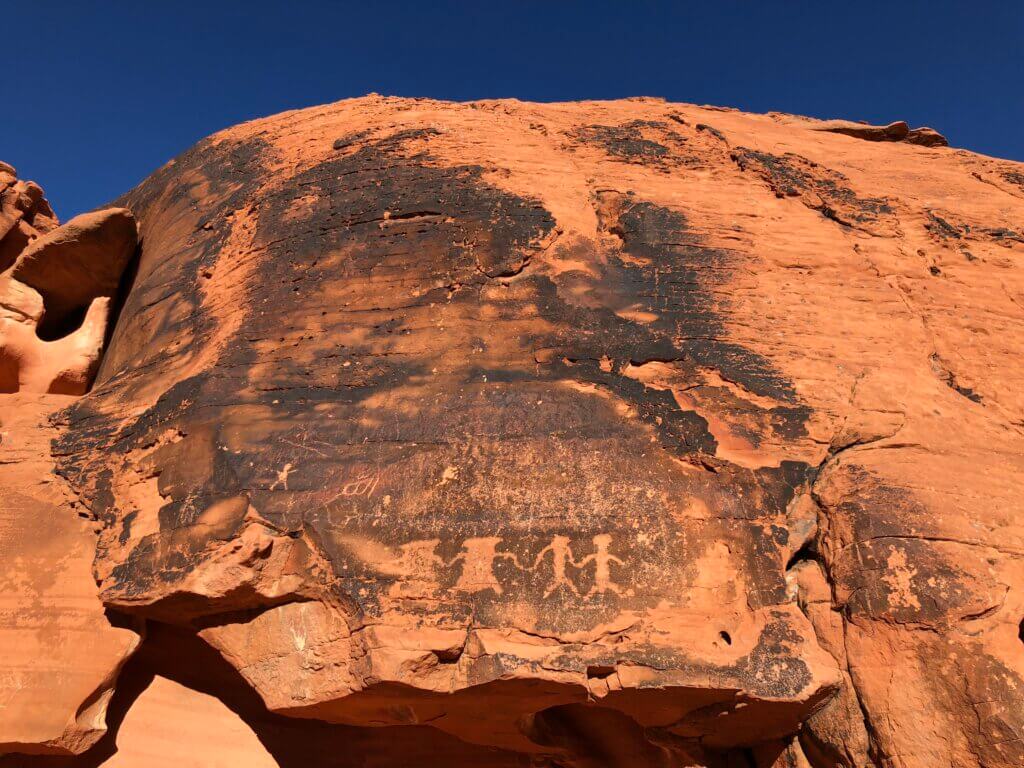
Petroglyphs, and you can climb up high to get some neat views of water – in the desert!
Elephant Rock (.3 miles, easy, 👍🏻)
An interesting rock formation that looks like an elephant
Atlatl Rock (easy, stairs optional, 👍🏻)
Tons of petroglyphs – all around the rock and up the stairs
Fire Canyon
Star Trek fans may recognize Fire Canyon as Veridian III, where James T Kirk (William Shatner) dies and is buried on Star Trek Generations. Star Trek fans make a pilgrimage here and scramble up the peak to pay their respects for the Captain. It’s also a cool overlook from the parking area, and there are some trails that go through the canyon and wash.
Driving 🚐
Zion is an easy 2.5 hours from Valley of Fire, very well travelled expressway miles. The scenery starts getting really good just before Springdale, but you’re going to see the best stuff in Zion Canyon, so don’t be afraid to drive this in the dark.
Staying 🏕
If you’re staying in Valley of Fire, it has 2 campgrounds – Atlatl Rock and Arch Rock – and both are $25/night and first come first served.
There’s a TON of BLM just outside of Springdale, making it an easy pull off and drive the ~20mins into the park in the next morning. Zion is probably the easiest place to BLM as so many people do it and there’s lots of space. As you would expect, lots of campgrounds in the area as well.
BLM – Smithsonian Butte Road
Free! The closest to Zion at about 6 miles. A small dirt area right off the road. No services.
BLM – Hurricane Cliffs
Free! The “True BLM Experience”, this area is huge and a free for all, you will likely see lots of other campers in all varieties of campers. Find some space for yourselves and get to know your neighbors! The roads out here are generally pretty good, but make sure you’re paying attention as a recent heavy rain can leave some places rutted. No services, about 15 miles from the Zion entrance.
The Watchman campground in Zion
$30 / night, reservations open, about 180 sites with a mix of RV, full electric, tent only. About .25 miles from the Visitor Center, so an easy walk in the morning to grab the shuttle. Can be notoriously difficult to get.
The South campground in Zion
$20 / night, reservations open 14 days ahead of time. About 120 sites, no electric. Right across the street from the shuttle.
Zion Canyon Campground NOT IN Zion National Park
$80 – $110 / night, full hookups available, reservations open now. Zion Canyon Campground is just outside of the park, about a 10 minute walk to the walk-in entrance. Has a pool, walking distance to shops.
Zion River Resort
$65 / night, full hookups available. About 20 minutes from Zion.
Zion National Park – Sunday 9/4
$35, Park Pass • Clear, high 80° low 59°
Zion is a tricky one, its popularity can be frustrating. The first buses start at 6am and there will already be a long line at that time, especially during a weekend. It will help that school just started, so most of the younger crowd will already be gone. The bus system is the only way to get to the top of the canyon unless you have bikes or are going to walk (walking not recommended, it is about 8 miles and is very up the whole way). The bus takes about 45 minutes to get from the bottom to the top. If you possibly can, get to Zion and in line early! Like, really early. Once you’re up in the canyon, catching buses becomes much much easier, so getting started as early as possible will reduce waiting the rest of the day.
Angel’s Landing (difficult, scary, thrilling, 👍🏻👍🏻)
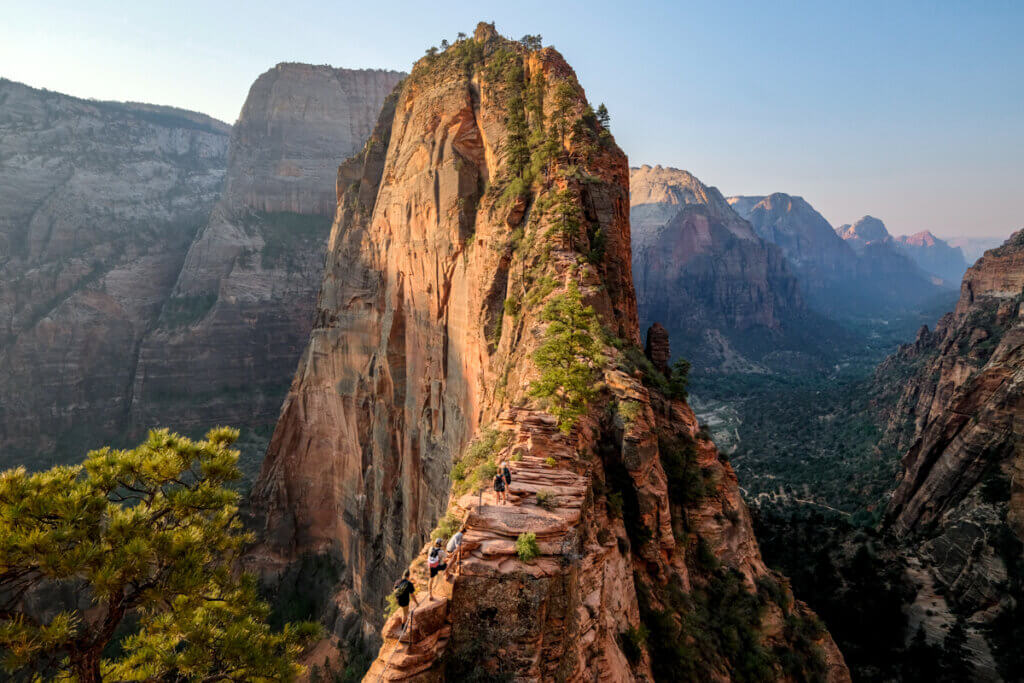
If you got permits, this should be your first priority. It’s a 5 mile trail that ascends 1600ft and includes the infamous Walter’s Wiggles – 21 switchbacks carved in a very steep section of the canyon – and the chains (aka the spine, the hogsback, and yes, you go all the way up there) – a very exposed section with 1500ft drops on both sides that requires bolted chains to help you traverse to the top. This one is not for kids or the faint of heart! But it is one of the highest rated hikes in all National Parks, and people do travel the world over in order to do it.
The Narrows (easy, 👍🏻👍🏻)
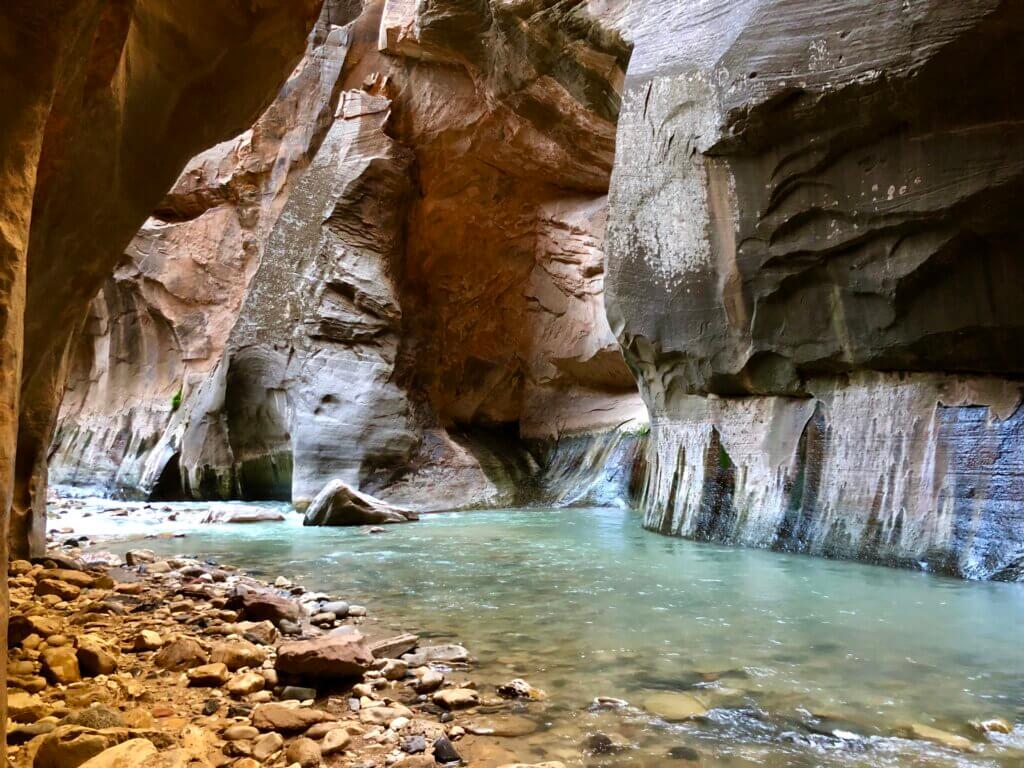
The Narrows is a 4.5 mile canyon carved by the Virgin River, which runs through all of Zion Canyon. Start at the 9th stop, the Temple of Sinawava. There is a 1 mile Riverwalk Trail you must take to get to the water entrance, all paved. Once you get to the water, walk up stream as far as you want/can, before turning around and retracing your steps back to the bus.
Most people will turn around very early, less than a mile from the water entrance, before really getting to the best parts! The best things comes to those who hike. Great for afternoon heat.
Good shoes definitely required, especially to get to the better parts of the canyon. You can rent waterproof shoes, pants, and a hiking stick from Zion Outfitters in Springdale for about $50. The average water temperate is about 60°. You can also just buy neoprene pants for about $30 if you don’t want a rental, but you’ll still need to figure out shoes. Flip flops will not do it. Deeper in the canyon, the water can get up to your chest in spots, depending on the water flow. If it’s me, I would buy the neoprene pants if you don’t like cold water, bring old shoes that you can stash for a week to dry out or donate afterwards. There’s always people ditching walking sticks near the water entrance if you’d like one of those. Save the money on rentals and the time going to and from Zion outfitters.
Zion – Mt Carmel tunnel (drive, 👍🏻)
Beautiful views and a cool tunnel, and you can drive it! The other side of the tunnel is a very different view of Zion, but equally beautiful. The whirlwind has you leave this way, and seeing it in sunlight is better than with headlights. If you are in an RV or tall van, please check the requirements for being able to pass through the tunnel! Vehicles over 11ft 4in need a special $15 permit to drive through the tunnel (good for 2 passes, request this permit at the entrance station on the way in). They actually stop traffic at both sides and let you drive through the center of the tunnel where it is tallest, so it’s a whole thing.
Vehicles over 13ft tall or 50ft combined length CANNOT pass through the tunnel. You will need to exit Zion and return through Arizona to bypass the tunnel, which adds approximately an hour.
Staying 🏕
Our recommendation is to stay around Zion tonight, and drive in the morning. Please look at the above camping section for a list of close BLM and campgrounds to Zion.
Bryce Canyon National Park – Monday 9/5
$35, Parks Pass • Partly cloudy, high 73° low 48°
Bryce has a much higher elevation (8,000 – 9,100ft) that everywhere else on the Whirlwind, and it is generally 10-15 degrees cooler than the Las Vegas/Valley of Fire area, so plan appropriately! The majority of activity in Bryce is the Amphitheater, the rest you drive to and get out and look. Once you get away from the Amphitheater, it becomes more forested, and less hoodoos. Bryce is only 18 miles end to end, so it makes a more easy afternoon after running around Zion. Highway 12 starts as you turn off 89 from Zion, and that stretch all the way to Capitol Reef – about 125 miles – is one of the prettiest stretches of roads in the US, full of vibrant colors, piercing rocks, and huge, neat formations.
Driving 🚐
Bryce Canyon is 1.5 hours north east of Zion, and it turns into highway 12 about 3/4 of the way there. Highway 12 is Chris’ favorite road, and is routinely in the top 3 roads in the US. It’s definitely better to drive this in the daytime if you can!
The Amphitheater (view, 👍🏻👍🏻)
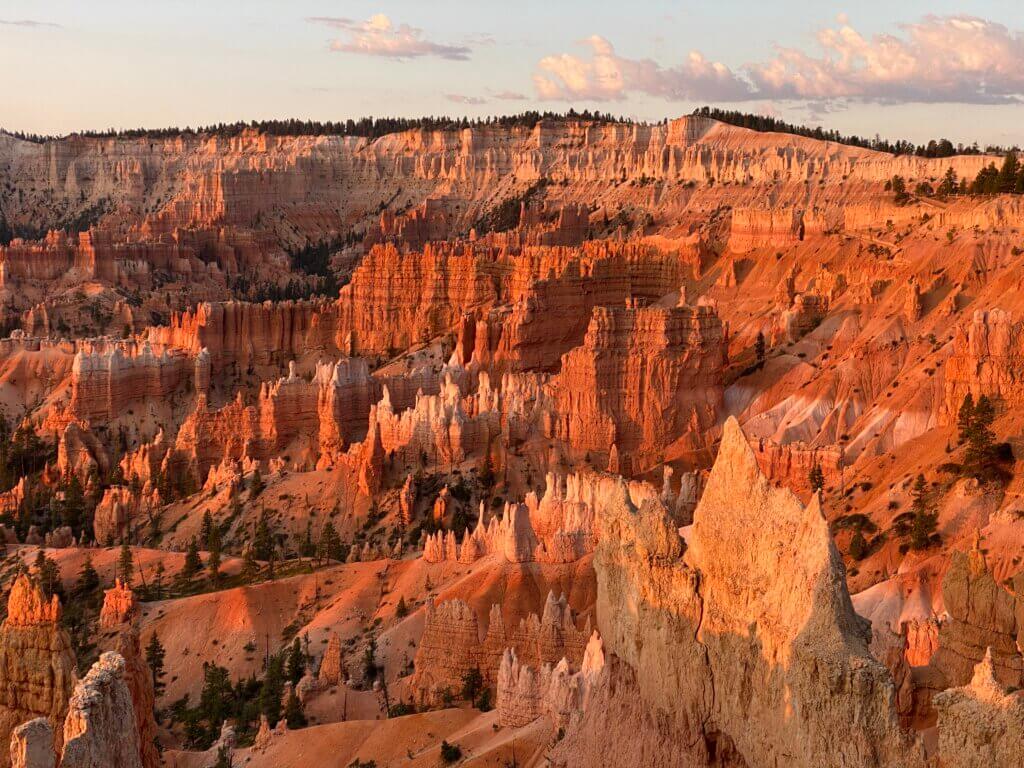
The Amphitheater is the iconic shot you see of Bryce – a panoramic view of pink and coral hoodoos in a deep bowl. You can see the Amphitheater from Sunrise, Sunset, Inspiration, and Bryce points. Sunrise Point is a famous location, for, well, sun rises. There will be lots of other people taking photos and videos of the sun coming up and illuminating the Amphitheater if you choose to go for the sun rise, so plan your arrival accordingly.
Queen’s Garden / Navajo Loop (3 miles, hilly, 👍🏻👍🏻)
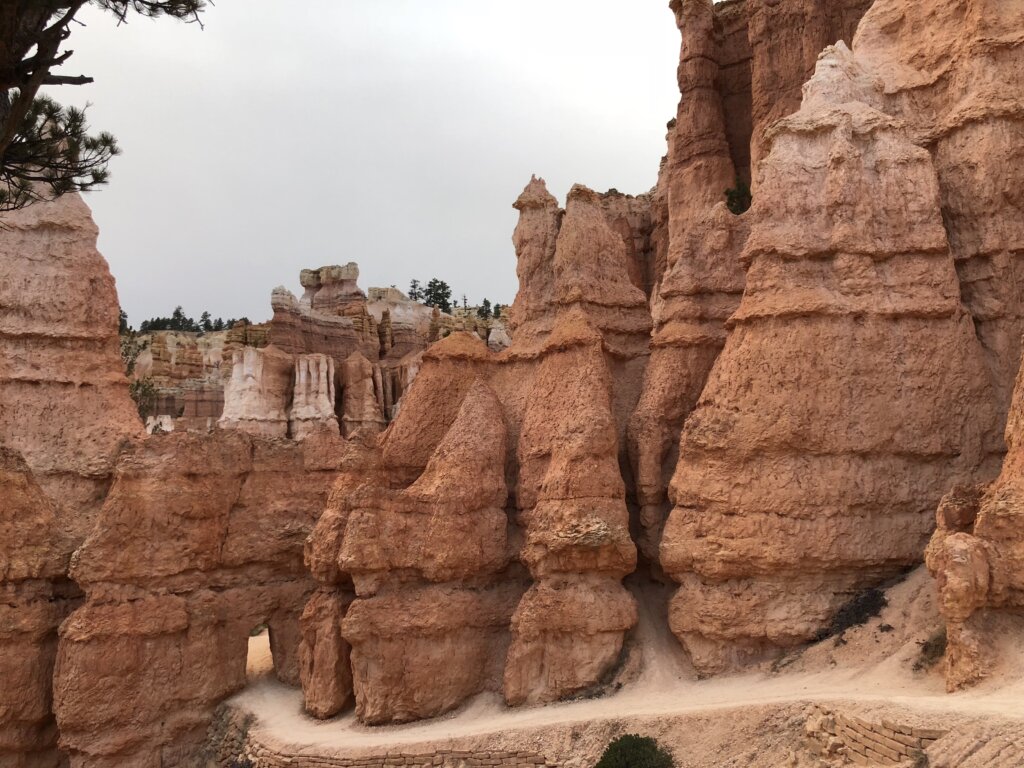
Most people never get below the rim, and that’s fine as viewing the amphitheater from anywhere is down-right other worldly. But the real magic happens at hoodoo level. The best route is the Queen’s Garden to Navajo Loop. Doing it clockwise means coming back up the steeper Wall Street, but you’re going to get the elevation one way or the other. Most tend to do it counter-clockwise (down Wall Street and up to Sunrise Point). The biggest downside to doing the Queen’s Garden to Navajo Loop is you miss hiking down next to Thor’s Hammer as it’s at the top of the other leg of the Navajo Loop, but you can walk the .1 miles down and just turn around if you want. But really, because Thor’s Hammer is so tall, the best views are at the top anyway. If you were only going to do one thing at Bryce, do this hike.
Rim Trail (easy, 👍🏻)
The Rim Trail technically goes all the way from one side of the park to the other, but you can start at any of the Amphitheater points and meander to the other. Great views, and easy walking. A couple of rolling hills, but lots of benches along the way! Total trail length is dependent on how far you want go – just turn around whenever you’re ready. You can always drive to next point if you want to.
Natural Bridge (drive up, 👍🏻)
Beautiful natural bridge you can just drive up to.
Thunder Mountain
Thunder Mountain is the area Disney’s Big Thunder Mountain Railroad is based on. Just outside of the park, you will actually pass it going from Zion to Bryce. There are pull offs for meandering trails that take you around hoodoos and cliff formations, and a pretty famous mountain bike track loop that is quite spectacular. Even if you don’t get out, it’s worth driving slow and having a good look around as you take the turnoff from highway 89 to 12 all the way to Bryce.
Mossy Cave (.8 miles, easy)
You can hit Mossy Cave on the way out, but it can be hit or miss. It’s best in the Spring because of all the cool icicles and gushing waterfall, but by September it may be lame. It’s a short hike at less than a mile round trip, so if the parking lot is empty and you have the time it may be worth checking out.
Staying 🏕
There is some BLM around Bryce, as well as tons of campgrounds. The general store at Bryce has showers, if you’re starting to smell feel it. Our recommendation is stay around Bryce, catch the sun rise (if you’re into that kind of thing), then continue to Escalante / Capitol Reef early in the morning.
BLM – Great Western Trail
Free! 2 miles to Bryce. The first mile or so on this road has no camping signs, but it is allowed after the signs. No services.
Both the Sunset and North campgrounds are walking distance to the rim, but the Sunset is closer to Wall St.
Sunset Campground in Bryce
$30 / night, no hookups, walk up only, 100 sites, half are technically tent only. Technically.
North Campground in Bryce
$30 / night, no hookups, 100 sites, half are technically tent only.
Ruby’s Inn Campground
$30 for tent sites, $45-$60 for vans and RVs. 250 sites and 5 minutes from Bryce entrance in Bryce City.
Bryce Canyon Pines Campground NOT IN Bryce
$30 for tents, $50-$60 for vans and RVs. Unknown number of sites, about 12 minutes from the Bryce entrance.
Escalante
Driving 🚐
It’s 2.5 hours to Capitol Reef, but there is so much to see on the way that we made Escalante it’s own category. The actual town of Escalante has fantastic places to eat – Mimi’s Bakery, Esca-latté, Georgie’s – and rustic outdoors shops.
Kiva Coffee House
A fanatastic little coffee house perched on a cliff in the middle of the desert. Blink and you’ll miss it, so watch your GPS.
Kodachrome Basin State Park (camping)
Amazing little state park at the base of colorful cliffs
Lower Calf Creek Falls (camping)
Also a hike to lower part of the 2 part falls
Capitol Reef National Park – Tuesday 9/6
$35, Parks Pass • Partly cloudy, high 77° low 57°
Capitol Reef doesn’t get much love, but it is amazing. It’s situated on top of the Waterpocket Fold, a 100 mile long “wrinkle” on the Earth’s surface. Caused by a massive fault, uplift, and water erosion, it’s left huge domes, carved canyons, and massive chimneys tightly strewn around the park.
Cohab Canyon from the campground (3 miles, elevation, strenuous, big payoffs, 👍🏻👍🏻)
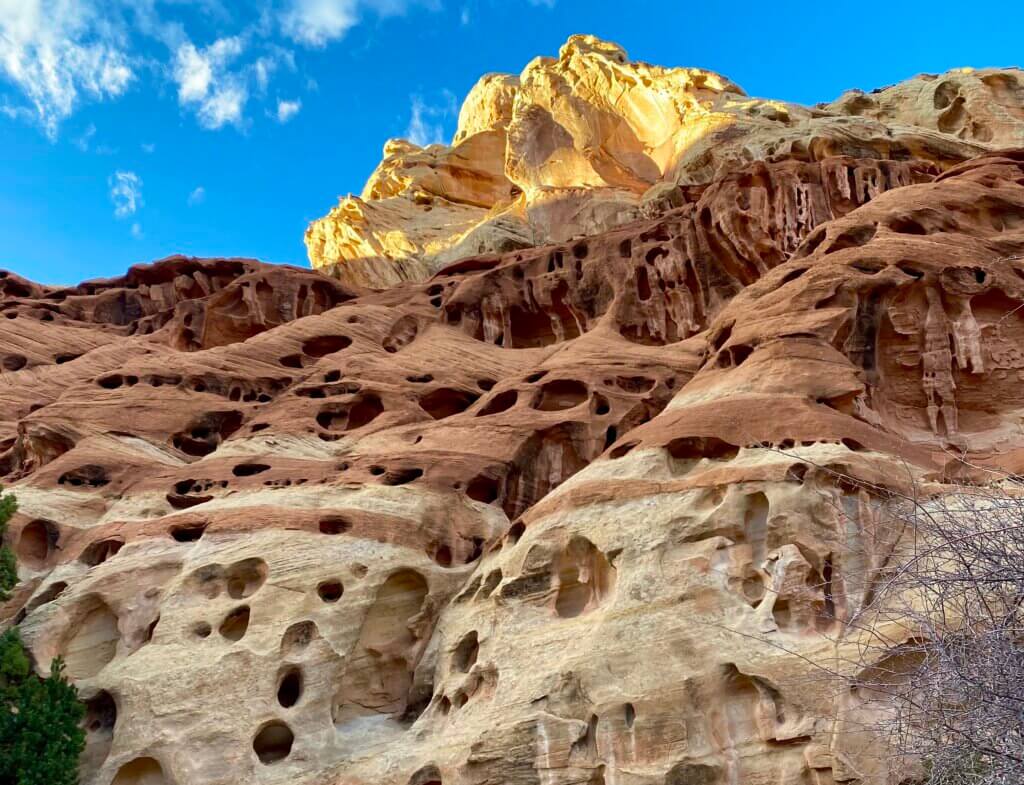
Climbs up the side of a mountain and through some incredibly gorgeous and unique rock, and ends on a cliff edge overlooking Highway 24. Even if you don’t go all the way to cliff, the rock is the star on this hike. Starts across from the campground, right where you’re saying “that cannot be the trail”. Park in the gravel lot.
Cassidy Arch (2 miles, elevation, hard, great arch 👍🏻👍🏻)
Capitol Reef is most famous for its arch, and if you’re lucky you might see some rappellers dropping down through it.
Scenic Drive to Capitol Gorge (8 mile drive, 👍🏻👍🏻)
The Scenic drive is paved and beautiful, and ends at a dirt road – Capitol Gorge trail. In summer, it is accessible to just about every vehicle (probably minus an RV) and well, well worth the effort. It ends at the trail heads for Capitol Gorge (1mi, easy, 👍🏻👍🏻) and Golden Throne (2mi, elevation, hard, 👍🏻👍🏻)
Hickman Bridge (2 miles, moderate, elevation, 👍🏻)
A natural bridge near Fruita, this trail goes under and around it.
Gifford Homestead
The original homestead in Capitol Reef, the serve homemade pie and ice cream daily, and it does sell out, so maybe check on that early.
Drive 🚐
Moab is 2 hours away, and unless you’re stopping at Goblin Valley (which is an awesome half day), getting to Moab for a full day at Arches is the way to go.
Moab
Stay 🏕
Due to Moab’s increasing popularity, the city is clamping down on dispersed camping. Several of the previously free BLM sites are now pay to help manage the area. I put the more popular ones on this list at the bottom, but there are closer, quieter options. There’s also an amazing campground in Arches, Devil’s Garden Campground, that can help you get a start on the day if you can get a spot. Lots and lots around Moab, and a bunch in and on the way to Canyonlands. There’s not a bad spot in Moab.
Devil’s Garden in Arches
$25 / night, 50 sites, all primitive. Really, really hard to get.
Willow Flat in Canyonlands
$15 / night, only 12 sites, all primitive, first come, first served.
Sun Outdoors North Moab
$47 / night, 10 minutes from Arches.
BLM – Grandstaff Campsite
$20 / night, 16 spots, toilets and trash, first come first served, no water. 10 minutes from Arches. Note – the map shows a restriction of 24 feet, but I haven’t found that listed anywhere else. Some of the sites are definitely shorter than others.
Up the Creek – Tent Only!
$35 / night, tent only. For real. Cars not even allowed into the campground.
BLM – Willow Springs Road
$15 – it was free the last time I was there, but I’ve read some recent reviews that mentioned it’s now $15. This place will definitely be packed and can get rowdy because of it’s proximity to Arches (It’s only 10 miles from the entrance) and usually filled with young climbers and mountain bikers. A great place to meet other nomads, but it will probably be loud. The $15 may help disperse the usual crowds though.
BLM – Yellow Circle
Free! Quiet, and out of town, Yellow Circle has established campgrounds about half a mile from the turn off. It can be rutted, and probably is not suitable for bigger rigs. The established campsites are to the right in this area, but you can camp anywhere half a mile off the road. This area is used by lots of ATVs and dirt bikes, so you will definitely get the associated noise until it gets dark. About 18 miles from Arches entrance.
Arches National Park – Wednesday 9/7
$35, Parks Pass • Clear, high 83° low 62°
Arches National Park REQUIRES a timed entry permit April – October 2022 (new this year). To get in, you must get one of these timed permits. You can find the link above, in the Permits section. You should do everything you can to get these when they become available (September availability starts on 6/1 at 8am PDT). We would advise you to get some for a day on both sides, in case you want to do one more thing before leaving, or you get here a little early and want to catch a sunset.
Arches is amazing, from top to bottom. You pretty much can’t do something wrong here. No doubt, 1 day here is not enough, and I’m not sure if a week is either.
Devil’s Garden Primitive Trail (7.2 mile loop, hard, scrambling, route finding, 👍🏻👍🏻)
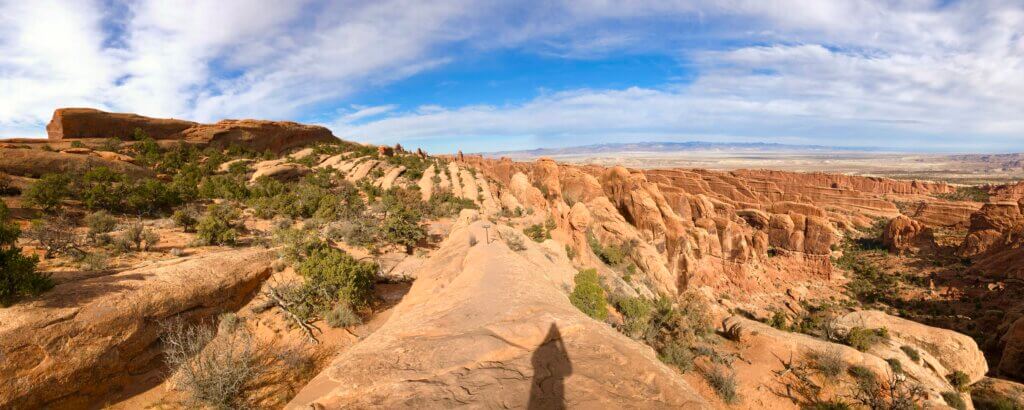
This trail is not for everybody – this is a primitive trail that has basically no trail signs or official map and is marked solely by cairns (stacked rocks). Requires route finding, good rock scrambling, good shoes, and lots of terrain changes. You will be hiking to the top of fins that are several hundred feet high with exposure on both sides, climbing around potholes filled with water, scrambling and edging across narrow rock, scaling uneven slickrock, and using piled debris to make it over the next rock. You’ll see 7+ arches, climb onto and around fins, and see the best of what Arches has to offer. This is easily the best public trail in Arches for adventurers.
Fiery Furnace (4ish miles, permit required, hard, scrambling, route finding, 👍🏻👍🏻)
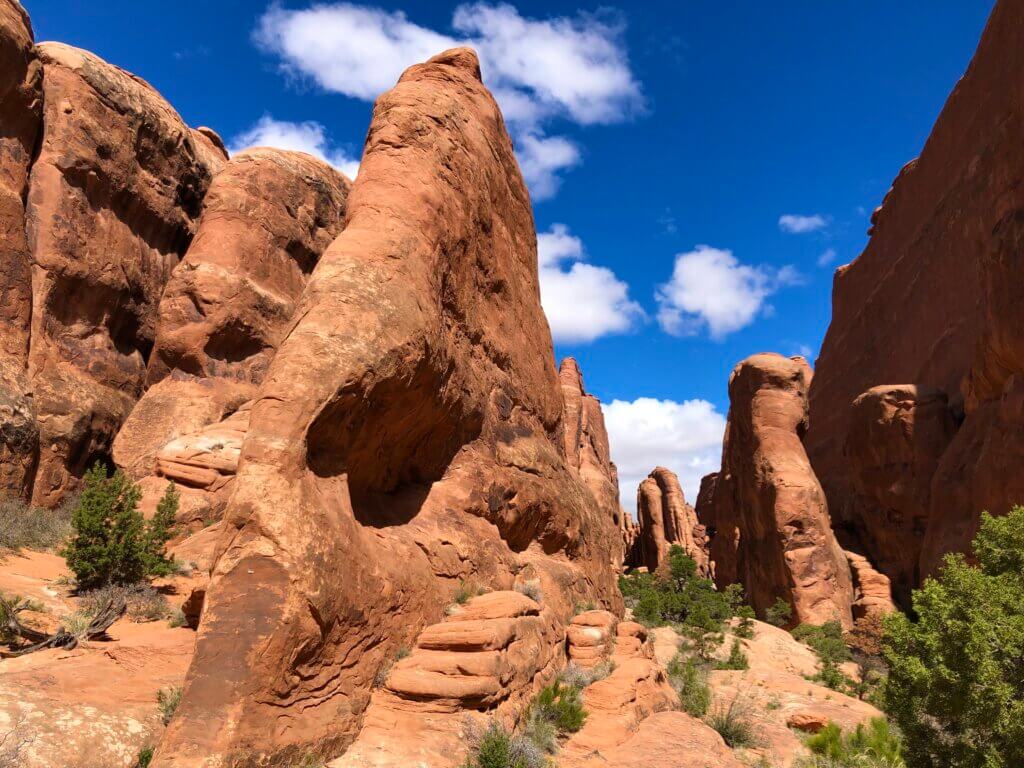
Fiery Furnace requires a permit, and they can be hard to get. Check the Permits section above to get one. Fiery Furnace is a tightly packed section of fins inside of Arches. With a permit, you’re allowed to meander, climb, and explore the maze. I call it a maze as you’re allowed to explore as much as you want, but there’s only one way out, and it’s marked by 15 or so 2×3 inch tiny brown signs, made to blend in with the background rocks (there’s actually one in this picture!). Getting lost is part of the adventure though! Requires rock scrambling, squeezing through tight spaces, and hiking around exposed cliff edges.
Delicate Arch (3 miles, hard, elevation, no shade, 👍🏻👍🏻)
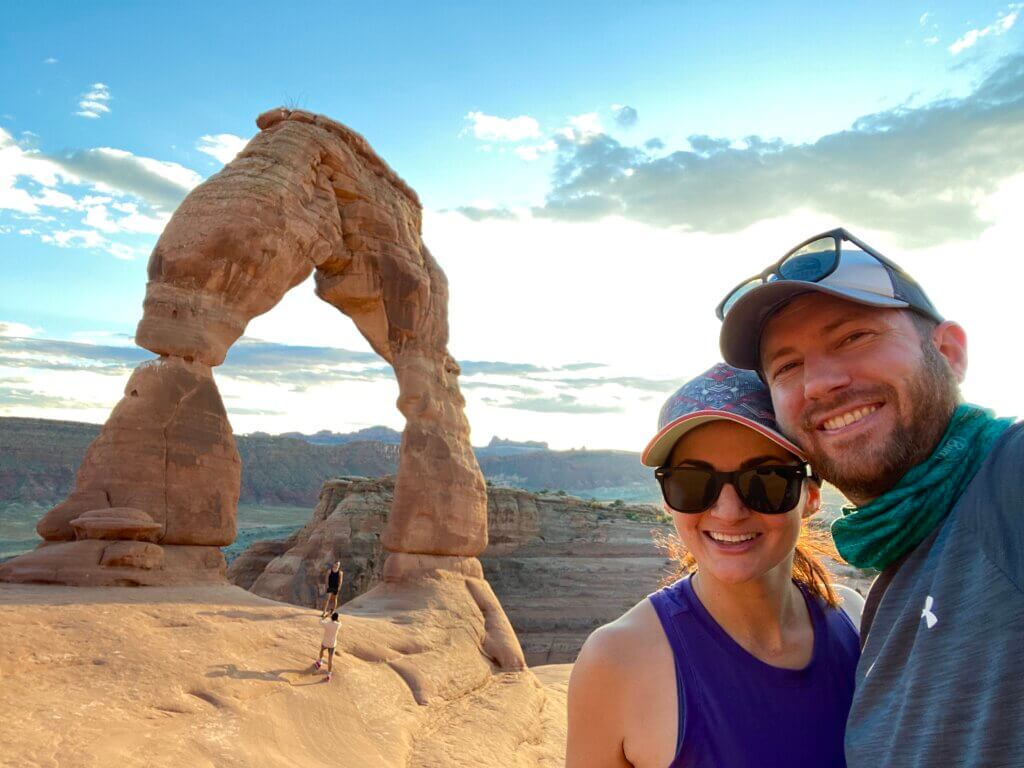
It’s the license plate of Utah. The iconic arch is a surprisingly hard 3 mile round trip up slick rock. Bring water! Some cool petroglyphs at the start of the trail near Wolfe Ranch. Lots do this hike near sunset and watch the sunset to the side of Delicate Arch. It does not set behind Delicate Arch, but off to the right of it. If you choose to do this, DO NOT forget headlamps and jackets.
Park Avenue (2 miles out and back, easy, 👍🏻👍🏻)
A leisurely stroll though some of the giant formations seen around Arches.
North Window / South Window / Turret / Double Arch (walk outs, easy, 👍🏻👍🏻)
Park and walk to some amazing and unique arches. 4 right next to each other, each very different. They have some associated hikes you can choose to do as well that generally hikes around to the other side. Sun sets behind turret arch, so timing this one is key!
Sand Dune Arch (.3 miles, easy, sandy, 👍🏻)
A nice arch set back into a tight canyon, usually cooler than the outside temp. A great hike from here into the campground if you want to pick up a couple more arches. (There’s also a hidden trail back from the campground that is spectacular).
Canyonlands National Park (Island in the Sky) – Thursday 9/8
$35, Parks Pass • Clear, high 84° low 61°
Canyonlands is broken up into 3 pretty distinct parks, with Islands in the Sky being the easiest to access from Moab. It features mostly park-and-overlook type attractions, though there are a couple of trails that are worth it for those seeking some adventures on slick rock.
Mesa Arch (.5 miles, easy, elevation, 👍🏻👍🏻)

The iconic arch you see in almost every picture of Canyonlands. Sun rises behind Mesa Arch and photographers can arrive as early as 2-3am to get the best spot.
Upheaval Dome (1.5ish miles, moderate, elevation, slick rock, 👍🏻👍🏻)
The origins of this “crater” have long been under dispute, about whether it was created from a metorite, explosion, or salt uplift. New data points to a meteorite, but questions still remain. A fun hike into the heart of a mystery!
Whale Rock (1 mile, easy, 👍🏻)
Climb a whale-shaped rock
Grand View Point Overlook (0-1 miles, easy, 👍🏻)
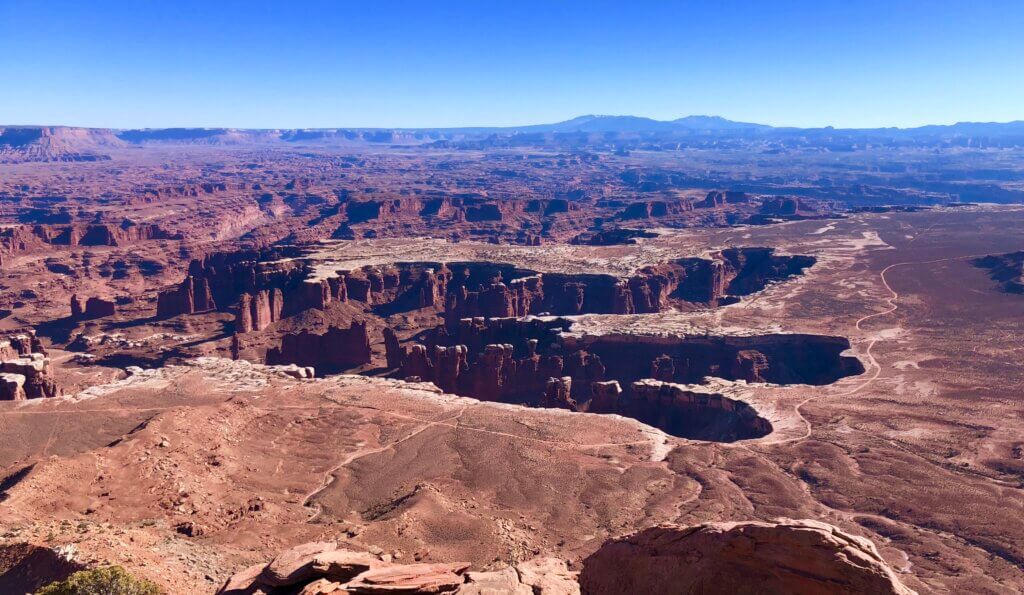
This is the other iconic view you always see from Canyonlands. An easy get out and look, you can walk about a mile out around a ridge. You can see the Needles district in the distance!
Schafer Canyon Overlook
Watch 4×4 jeeps going into the mesa of Canyonlands via the 20 mile Shaefer Trail.
Green River Overlook
A beautiful vista overlooking the carved landscape
Drive 🚐
It’s 2 hours to Grand Junction, and it’s an easy drive, even at night.
Colorado National Monument – Friday 9/9
$25, Parks Pass • Clear, high 81° low 61°
There are a couple short hikes here, but most things are right off of the 23 mile Rim Rock Drive, which is spectacular. Early mornings will almost guarantee big horn sheep sightings. Our recommendation is to get in late, and see the Colorado National Monument early in the morning to catch the light and sheep. Then take off towards Dinosaur.
Stay 🏕
Grand Junction is surrounded by 1.5 million miles of public lands. Colorado National Monument also has a campground ($22).
Saddlehorn Campground in Colorado National Monument
$22/ night, 50 sites
KOA Grand Junction
$35-$50. $9 for showers, but you need it. Also has a pool if you’re more of a bath person 😅. Lots of outdoor games and things for kids too, including corn hole, playground, and an outdoor movie theater.
BLM – Rabbit Valley
Free! About 30 minutes west of Colorado National Monument and just across the border from Utah coming from Moab. If your plan is to leave Moab exhausted, you’ll pass this place 45 minutes before you get to Saddlehorn or the KOA. Easy to pull off and get some sleep before Colorado National Monument and Dinosaur!
Drive 🚐
It’s 2 and a half hours to Dinosaur! The first half of this drive is quite beautiful, and quite desolate. Make sure you fill up before you leave Grand Junction. See you at the campsite soon!